I've been organising my craft cupboard. For
months.
It's not because I'm lazy, although, I can be. It's not because it's a craft cupboard and not a craft studio-entirely-separate-from-the-house and totally fabulous. Although, that would help.
It's because of
this.

I'm a mother now. Which means things that used to take no time at all unless I got distracted by "inspiration", now take forever. And you can forget about pouncing on inspiration when it strikes you. I'm more likely to be pouncing on a toddler desperate to get into the cupboard and her hands on
all-of-the-things.
But I digress.
I have long had my idol/girlfriend Rebecca's
$75 craft room and
craft hutch as inspiration. Nothing would make me happier than turning some old stuff into beautiful storage for the things that help me make beautiful things out of some old stuff. (And the cocktail bags, book covers, cards and whatever random craft takes my fancy).
And of course, there's bloody Pinterest. Full of gorgeous craft rooms and studios and things that I don't have! I have a board dedicated to the art of craft storage. I've spent way too long drooling over other peoples organisation. And crafts, and supplies, and money, and time.
But I digress.
In our last house, I had a craft shelf. So, things are looking up.
Here are a couple of horrible before pictures of my cupboard, which is unfortunately in the baby's room.
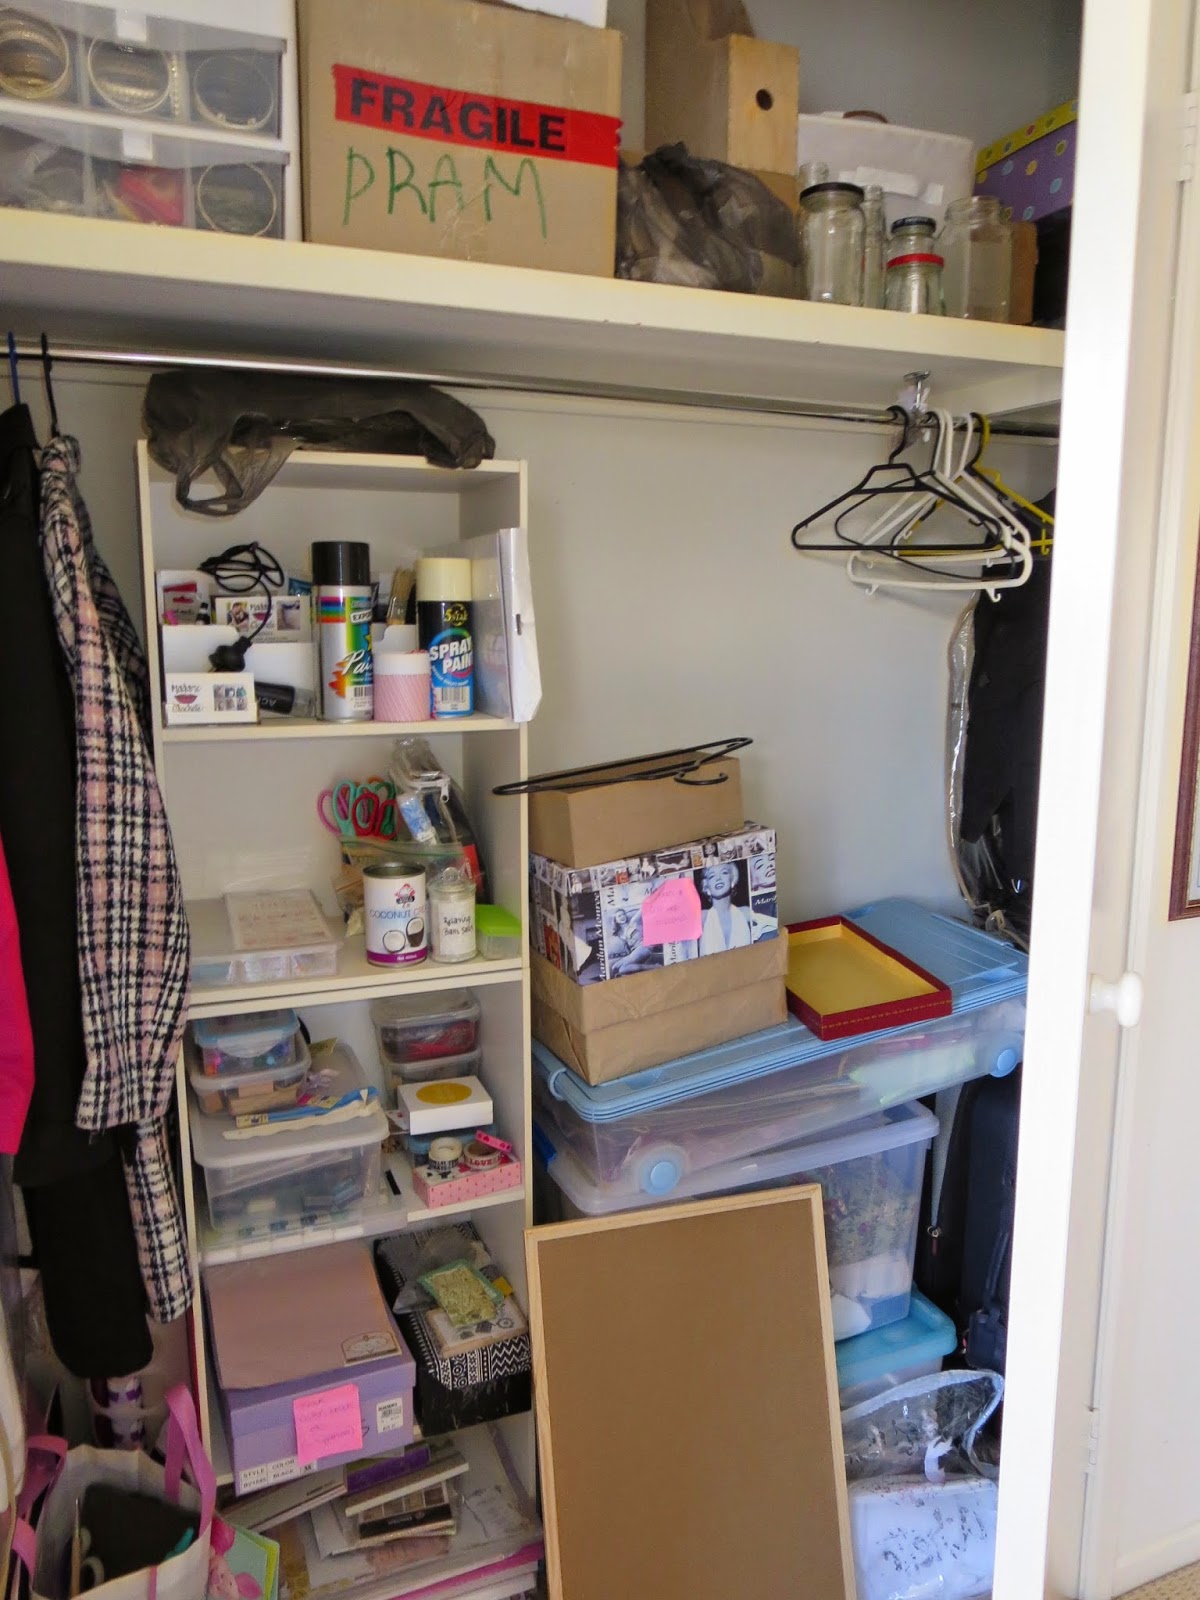 |
| One of those containers doesn't even fit properly. Who knows where anything is! |
 |
| What if there's a glitter emergency? |
 |
| The box labelled "Pram" contains jars. And then there are more jars to the right. It's my latest thing. |
|
|
O.k. So it was a mess. The problem with all the bits and pieces is that there are lots of
different bits and pieces. There are lot's of great ways to store things, but those solutions mostly only apply if you have an entire room. Luckily, I love a creative challenge, and finding ways to do things a) on the cheap and b) as pretty as possible are right up my alley.
So, here are the after pictures.
 |
O.k, so it's not what I'd call pretty per se...
|
Pretty good yeah? Well, at the very least, everything has a home and it's mostly labelled so I don't have to remember where I put things.
 |
I'd like to thank Pinterest for the IKEA bag holder as wrap holder idea.
I bought the drawers from Kmart. They were the cheapest at $15 for a set of three drawers. Brilliant! They're holding scrapbooking paper pads, stamping stuff, textas,pencils and paints, card making supplies, stickers and rub-ons, and scrap material. Above them is my box of Madame Clochette Cocktail bags waiting for a new home. (In my dream house there is a lovely shelf for them to be displayed on. There's also an outdoor spa.) On top of that are my box of ribbons, my "current projects" box and a mini chest of drawers I'm currently using for zippers and stuff.
|
 |
| The top shelf, now not a safety hazard. |
|
|
|
|
|
|
|
| | | | | | | | | | | | | | | | | |
|
|
|
The top shelf was a debacle. Now everything is all lined up nicely. On the far left we have my market stuff: props, shelving, point of sale, etc. Then the small clear box holds my Madame Clochette bridal bags, al in their own dust covers. Above that, I'm pretty sure it's more market stuff. I really need to finish labelling.Tucked in the side is the baby album I am still yet to start for Tadpole. Then the box of bangles and jewellery I use for my bags. The rest, I think you'll find, are all helpfully labelled.
 |
| This poor shelf was doing it's best before, but now the working conditions are so much better. |
|
|
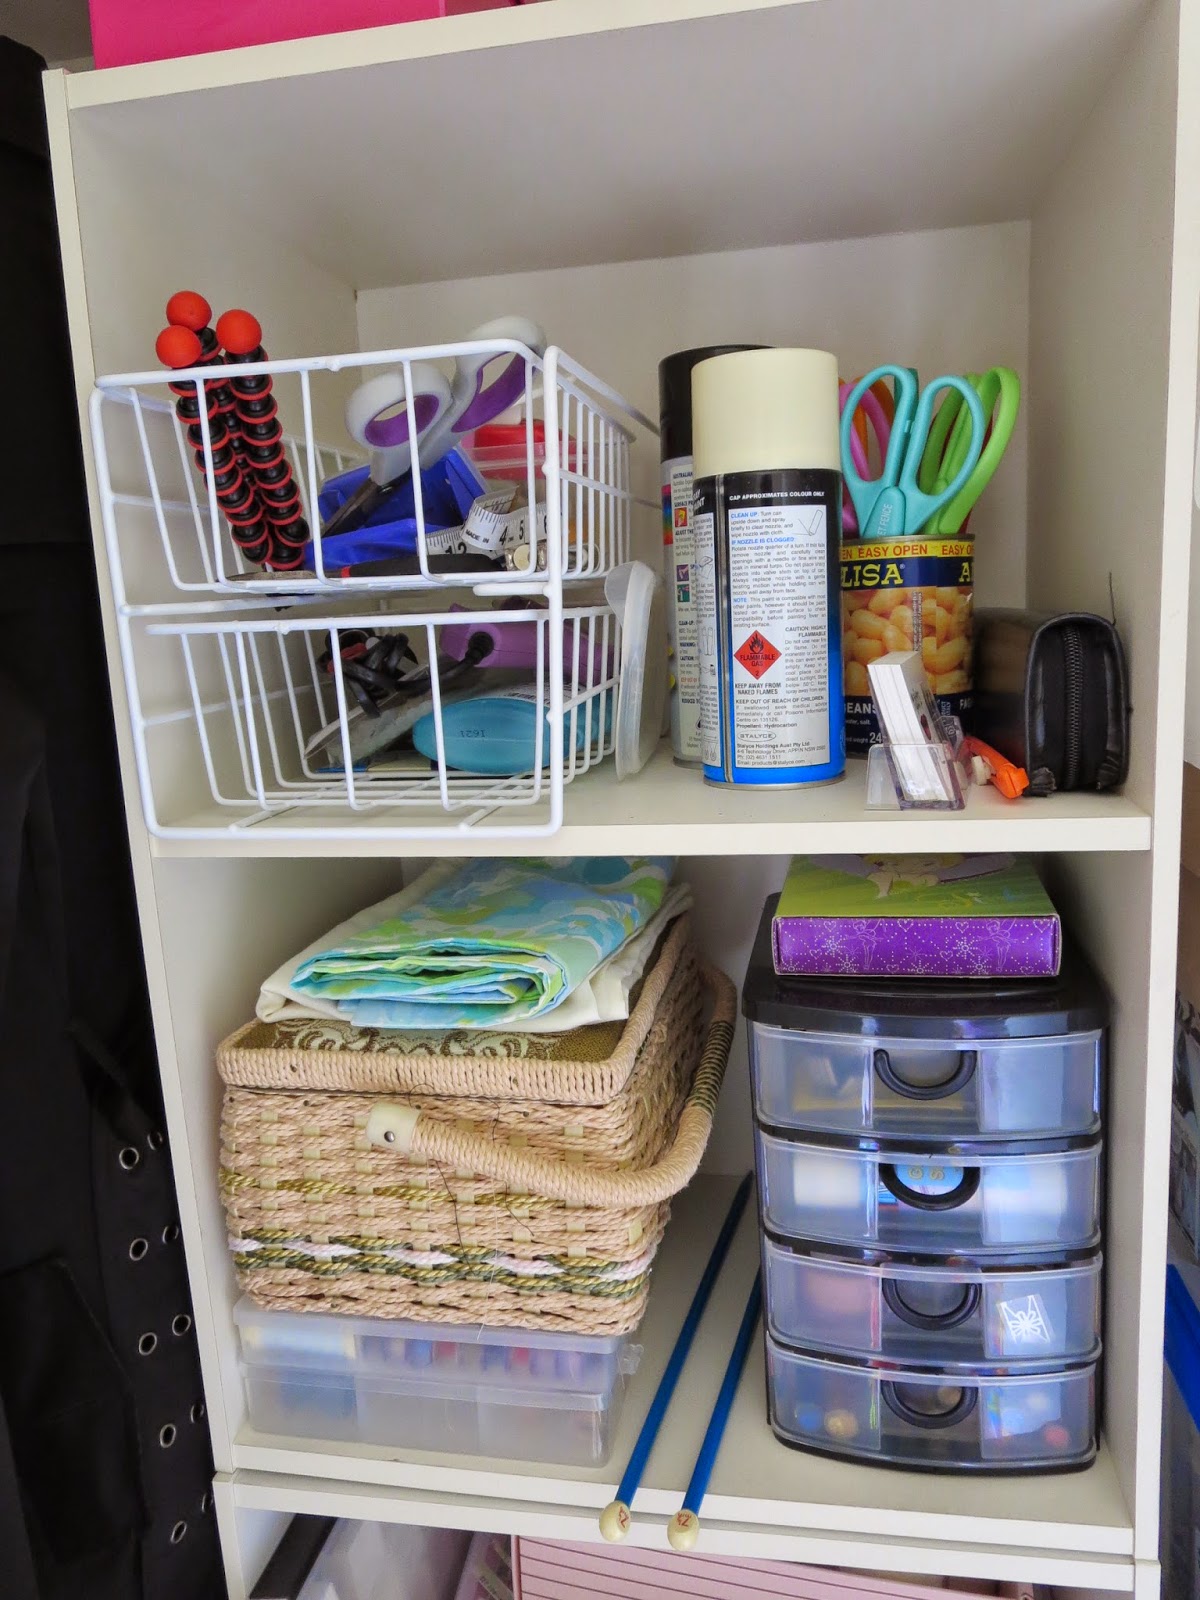
Top shelf is for tools, things I use often like glue and scissors. And a handly little stash of business cards. We then have my ancient sewing kit sitting on top of my ever growing collection of thread. The cute little drawers are holding random odds and ends like magnets and plain hair clips, more glue and tape, washi tape, and the ever important glitter.
 |
| I'm trying out this idea for fabric storage. I'm undecided. |
Paper storage is my downfall. I really want to have it all separated and ordered, but I can't bring myself to by the only wide enough office trays I can find from Officeworks ($36 for six, technically not expensive, but...) Perhaps I'll cave though, because finding what you need in all of that is a pain! Beside the paper are more stamp pads ( bought for a steal at a market) and above are left over Bath Milk bottles from last xmas.
To the left of the shelves there's a box for all my project supplies... like MDF things, mini canvas etc. I can't remember what's in the bag on top. What did I say about labelling...?
So, there you have it. The organised, if not very pretty Cupboard of Creation.
Here's to the next project. Coming soon.
Any thoughts on a better way to store my crap? I'm all ears!


