UA-47203708-1
Showing posts with label Baby shower. Show all posts

Tuesday, April 14, 2015

Baby Shower Bonanza, The Last post: Games and De-brief.

The actual Baby Shower was a couple of weeks ago now.

I flew to Canberra, all by myself, kid and husband free, and spent  a few day with my sister. These were our last moments together, just us girls, for what will probably be quite some time.

We visited my parents in their little country town on the day of a football game, watched a chick flick while eating home delivered noodles,I spent a lazy morning washing my hair, we Baby Showered, we shared pizza with friends, I cooked a meal for my sister and her husband and then I was home again. It went all too fast, but was relaxing and lovely.

The Shower went beautifully.
The Thank you gifts looked beautiful on the table, the venue was lovely, the food and champagne delicious and the time just flew.

That was a problem. It turns out, I over scheduled.

Originally, I had just two games planned; a Guess the Tea game where guests passed unlabelled tea bags around and tried to guess the flavours, and a Royal Baby Quiz; a quiz written by my mum that was REALLY hard. These two games took a bit of time and would've been plenty to do... remember it's customary to open gifts during the shower too!

However, we also had the "Guess the Belly Circumference", The "Boy/Girl Guessing Jar" and the book of advice. At this particular shower, I didn't need the belly measuring or the advice book at all... 

C'est la Vie!

Lots of chatting...

Lots of lovely food... (If you're in Canberra, check out The Burbury - gorgeous view)

and it all looked pretty. I'm including the Champagne in that statement!
Oh, and there were prizes too...

Tea Cup with infuser and tea sample

Tea Cup and saucer with infuser and tea sample

The "just-in-case" extras, infusers and boxes of tea
And that concludes the Baby Shower Bonanza.

Needless to say, I had a ball designing and making all the elements.

But, I had an even better time celebrating with my sister.

Congratulations Sadie. Can't wait to meet the little monster.

xx

MC

Friday, April 10, 2015

Baby Shower Bonanza, Part 7: Lace Crown

I have fallen madly in love with Lace Crowns.

Pinterest. Again. Dammit!

At my baby shower, Sadie had me wear Fairy Wings. Obviously. (Or maybe not? Long story short: Sadie used to say I was like Tinkerbell and bought me car seat and steering wheel covers to advertise that fact. I was using them when Mr Frog and I first met, so he called me Fee Clochette (Tinkerbell in French, but with an accent over one of the E's). I started a business, by then I was married, and so: Madame Clochette).

Sadie likes to pretend she's royal. On the phone one day, she told me her tiara was giving her a headache. I thought it was some sort of metaphor. I was wrong. She was actually wearing one of her tiaras at work. Note the plural.

So.

She just HAD to have a special Mum -to-be Crown.

First, I measured a bit of cardboard around my head, guessing hers would be about the same, and taped it together. I covered the whole thing in tape so glue and paint won't stick to it. Then, cut some lace to fit.
Lace with pointy bits looks more... I don't know, crown like?
Using a glue gun, glue your lace ends together...

Using my fancy tripod...
...making sure the ends overlap like this.
Mind my manicure...

Make a half/half mix of PVA glue (Modpodge for the Yanks) and water. Thoroughly soak the lace.


Gently squeeze out the excess and slip over your cardboard ring. Let dry. If you use too much PVA, your lace will look like plastic, not lace, which is really not the point.


That succulent is keeping my crown from blowing away!


Next, paint your crown. It's easier if you take it off the cardboard and get paint all over yourself... the coverage of the lace is better. I then added a coat of glitter paint. And then one more, because you always need more glitter.


Once it's dry, you're done. Prance around the house with it on, admiring yourself in any and all mirrors. (You could also hot glue on some sequins or jewels).


Then, at the actual Shower, just barely remember to get a photo of the guest of honour wearing her crown.


Sadie, mid conversation

Every girl needs a crown.

Don't they?

Next up in the Baby Shower Bonanza, I tell you about the games we played, what I'll do next time and finally wrap this thing up!

MC
Monday, April 6, 2015

Baby Shower Bonanza, Part 5, Girl Or Boy Guessing Jar

This was just a little something extra. A "just because". I also have a problem with jars.

Take one jar.
Pick a fat one.
Next, decorate with a paper doily, a piece of leftover invitation paper and a ribbon.

Keeping it simple.
Then, on pieces of "scrap" paper left over from the printing of said invitations, stamp "Boy" and "Girl". Repeat.

It's a 50/50 shot...

Here's the deal: Guests choose which sex the baby will be, and the name the parents will choose, write their own name on the paper and pop it in the jar. After the Bub is born, the brand new mum and dad open the jar and see what crazy ideas people had. Oh, and if someone actually guesses right... I'll send them a prize.

(This will not work if the mum and dad to-be blab about the names on their list. Although, people aren't always listening to crazy-about-to-be-parents.)

Voila!

What's your guess?

Next, I wrote a book.

Kinda.

MC

Thursday, April 2, 2015

Baby Shower Bonanza, Part 4, Packaging

 Remember those beautiful tea bags and sugar cubes?


 They need to be presented in something.

Something equally beautiful. These will sit at the place of each of your guests. This gives them a hint of the kind of soiree in store.

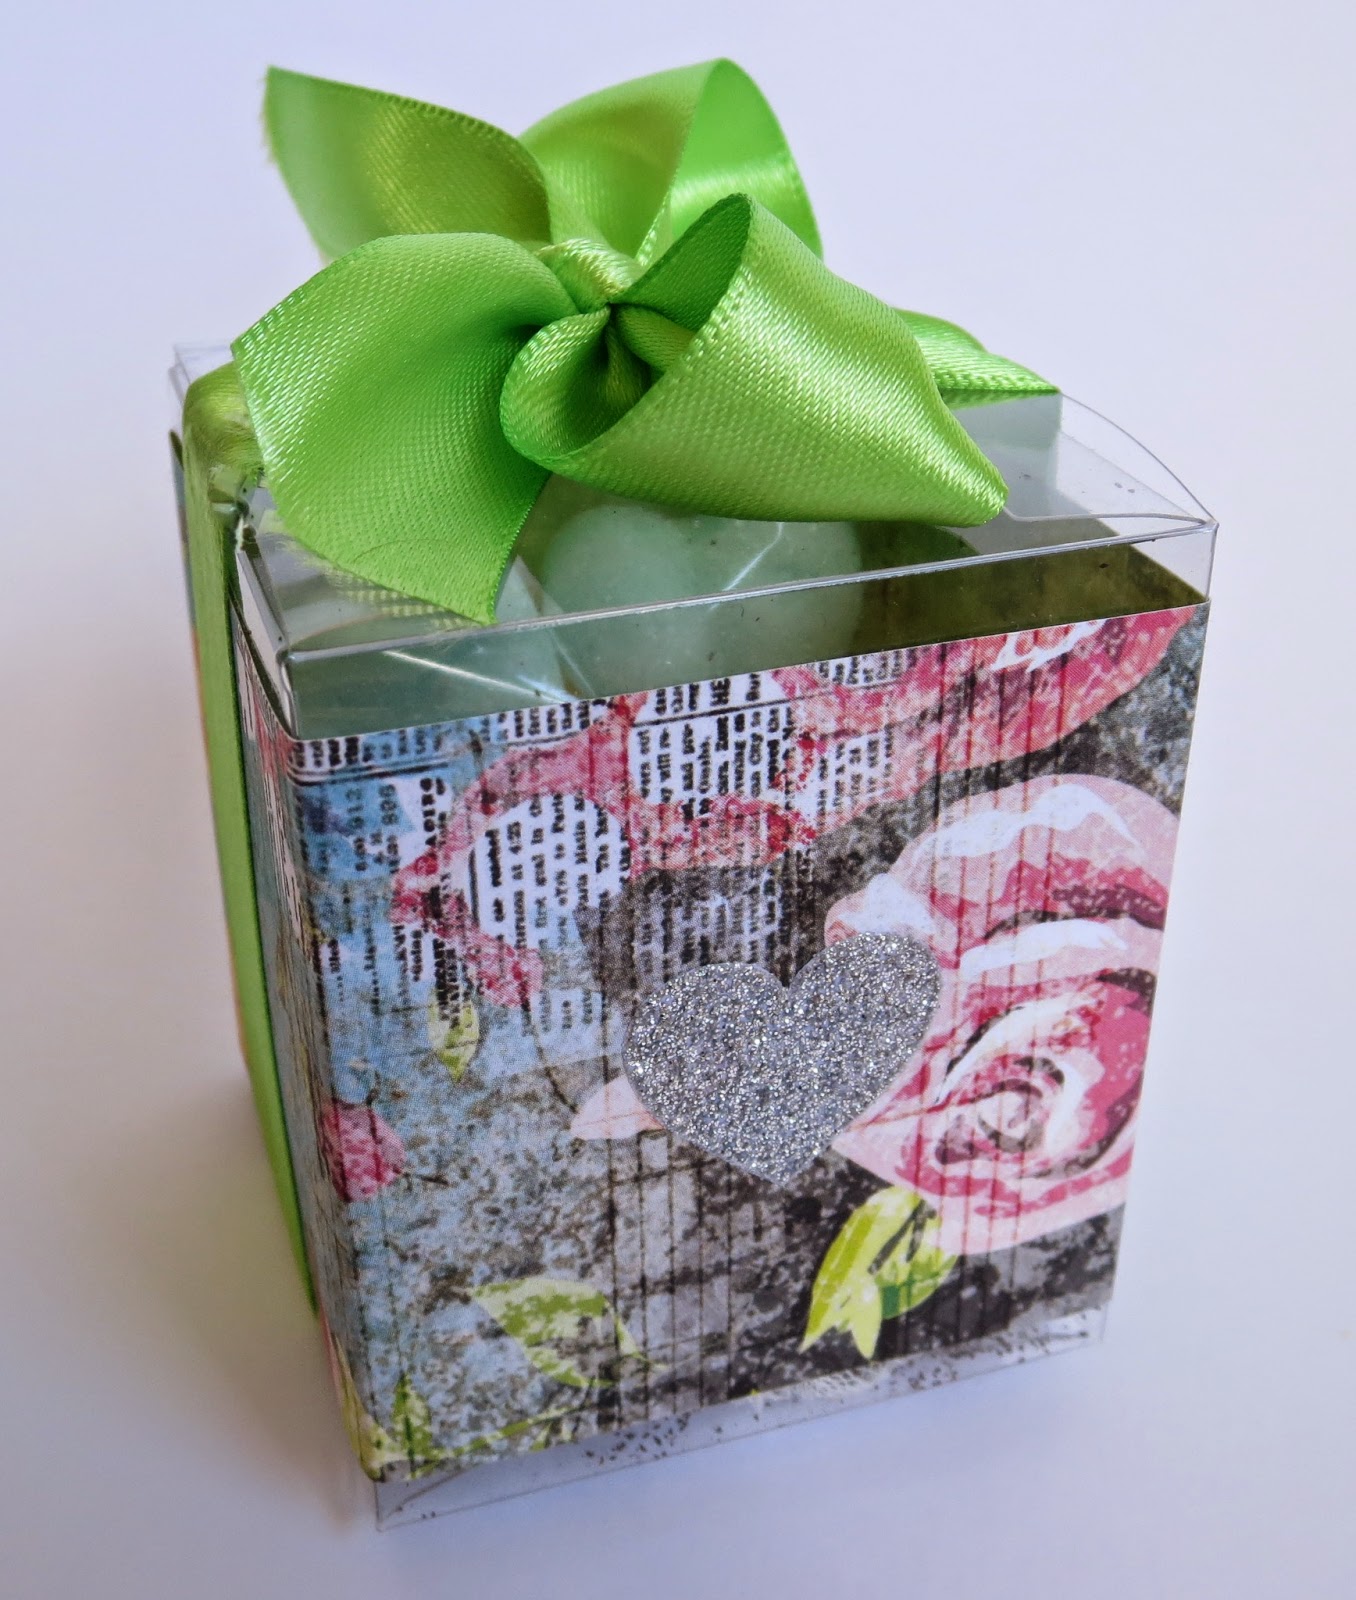
This time, I decided to go with clear boxes, that I could decorate and tie with a ribbon. Let's keep it simple people.

Cut some co-ordinating paper to size, dot with strong, double sided tape, and wrap. If you use the skinny, cheap stuff you had left over, the paper will pop right off the plastic. Live and learn people. The first one I did had the paper join in the middle, but from then on I had the join at the very edge at the back. You can now barely see it.


Adding the seal from the invitations ties evey thing in nicely.
Note the Madame Clochette mug in the background!
 And then just keep going and going.
Place the sugar cubes in a little bag of their own.

I'm pulling this odd, smug face because in the other photos I look cranky and double chinned.

This one is perfect.


Repeat. And Repeat.


Pop a packet of sugar in the box, and add teabags. It ended up looking nicer if I held all the tags together and then placed them in the box, just so.


Now tie it all up with a matching ribbon. To get the perfect bow, with even ends, make one side longer than the other. How you tie it will depend on which side needs to be longer.

Demonstrating the craziness...

I'm mainly including this pic because I like the over exposure and my nails.
 I got a little excited using my mini tripod again, so I apologise for all the ribbon tying pics. I know you know how to tie a bow!


Repeat, and repeat...
Soldiers ready for combat?

After all that faffing, a gratuitous shot of the bloody bow...
This pic wasn't taken until after this little one had been to Canberra and back, so it's looking a little frayed. Still pretty!
 
 And Voila! Thank you gifts, party favours, or bonbon-whatsits.


Next up, a guessing game in a JAR!
Can you imagine my delight?

Salut!
MC


Sunday, March 29, 2015

Baby Shower bonanza, Part 2: Handmade tea bags

And so it continues. Do join me for a little craziness in the form of Handmade Tea Bags.

Yes. Teabags. Made by me.

There are numerous versions on Pinterest, but this is the one that inspired me and gave me very simple directions. There are even free, printable tags.
Printable-Mothers-Day-Tea-Tags
Lia Griffith
 What I loved about this version is that the teabags look like someone actually made them, and with love. I know, sounds corny. But I am!

What I also love about these little bags, is that they're cheap to make. The muslin cost $2.50p/m, the tea, Melbourne Breakfast from T2 (Sadie's favourite) was $30 for 250g(which ended up giving me about 85 teabags) and the tags were made from scraps of the invitation paper.

One teaspoon (one you use to stir your tea, not a measuring spoon)


Gather and tie
Trim, and you're almost done.


These weren't hard to make. If you're good with your hands, they'll be easy. They're just fiddly, and time consuming.

I made 120 tea bags. I know.

120? Yes. There were 27 people on Sadie's guest list, so I made 30 invites, just in case she'd forgotten someone or decided that some Facebook friend was nice enough to come along. I'd decided to use plastic boxes to package them in, and so, to make it look generous and not stingy, four tea bags each was the plan. If you're using smaller packaging, you could certainly package 1,2 or 3 and they'd look gorgeous. (Keep an eye on the Madame Clochette Facebook page for a few different options soon).


Like in Lia's original post, these teabags would make a great Mothers Day gift, or you could even package up some "xmas" scented tea and give them as Xmas gifts.

Hmmm... That's a good idea.

Must remember that.

Next up in the Bonanza....

Handmade Sugar cubes.

A bientot!

MC

Wednesday, March 25, 2015

Baby Shower Bonanza, Part 1 : Invitations

Here begins the craziness of my sister Sadie's baby shower.

She's my little sister. My only sister. And she's having a baby.

OH MY FUCKING GODS!!!

Anyhoo, Sadie has gone above and beyond the call; for my Canberra wedding, My French Wedding, My Canberra Baby Shower, my Melbourne Baby Shower, and then a few days after the birth of my actual Tadpole, she flew here and back in one day.

So, I kinda owe her. Plus, I haven't always been a very good big sister. Pretty crap at times to be honest.

She's a bit of a control freak, (A LOT of a control freak... she's a Virgo, just like Mr Frog), so I gave her plenty of choices to make a long the way. Handy, because I suck at making decisions, especially small ones that feel very important.

She'd already booked a High Tea venue while I was eating France so with that in mind we tossed around a few ideas for a theme. I constantly kept talking myself down from the crazy. I don't know why, but it's the place I go to first. We both did some perusing of Pinterest (EVIL PLACE! LOVES CRAZY!) and managed to head in a similar direction. Once I knew the vibe she was hoping for, elegant and pretty, combined with her own vintage style, I needed colours. She told me the theme for the baby's room would be "Woodlands" using leaf green, or pistachio. I headed to the Kaisercraft website and got to hunting for something that might fit. I sent her a few suggestions, she sent back the papers she liked the look of and I made a choice.

For the invites, I chose this:

"Expression" from the Kaleidoscope range.

After much faffing, I decided to keep things simple. Unfortunately, I forgot to take photos of my progress, so this isn't a tutorial, but as you'll see, when I say simple I mean it.
Simple, Elegant AND  a tiny bit of bling.
A little more than half the card is Kaleidoscope paper, stuck down with some double sided tape. The other half has my printed piece, also stuck with tape. We then get a little fancy with some lace and ribbon. The lace has a raw edge and only the ribbon is tucked under, for a less bulky but still finished look. After a few days staring at my prototype I decided it needed a little something. These sparkly hearts are just big enough to be pretty but not blinding. (You can find them at Officeworks).

Now, my original plan was to used craft cards from The Dollar king, the ones I always use for birthdays and a bargain (because I have to do everything as cheaply and as fabulous as possible). Of course, after I pre cut ALL OF MY PAPERS I realised I couldn't get them in time, so I bought a few sheets of white card and cut them to size.Even cheaper. Instead of opening the card, guests just flip it over.
I even downloaded a new font.
Popped in an envelope and sealed with a larger sparkly star (also from Officeworks, and excellent value) they were good to go.

And so ends the first chapter of the Baby Shower bonanza.

Next up, Thank you gifts.

Stay pretty,

MC