UA-47203708-1

Sunday, May 19, 2013

Pretty Flowers

My fabric flowers turned out beautifully!

Although cutting out the fabric was a tad time consuming, it wasn't very hard, and the results are totally worth it.
You can find the how-to details here where I did. Just keep in mind that for really "full" flowers you'll need more fabric than you think. Also, instead of paper lanterns, I used Styrofoam balls, which is the cheaper option. ($2.99 for a pack of 12 or so, all different sizes)


Lots of hot glue and a little patience...


The finished product

These should look fabulous in bubs' room. They were really easy to make.... I was on such a roll I could've made more, but easy does it!
Now onto canvas # 2.
Back soon :)
MC

Monday, May 13, 2013

Not dead, Just Distracted!

Yes, it's been ages. Yes, I forgive you for thinking I'd just given the whole thing up. Yes, I've been a bit slack.

But I'm back!

And up the duff.

Well, I was the last time I posted too, just not so open about it. Now I'm huge there's just no denying it. And while it means that my cocktail bag making days are on hold for now, it doesn't mean I've been idle.

There's been some card making...

 A little something for hubbys' first day at work


There's been DVD cabinet painting... which I won't show you because it's just boring white, but let me just say it nearly killed me!

There's been a little present for me...


And now I'm all about the baby's room...


I'm in the middle of making hanging fabric flowers... pics coming soon.... yes, I mean soon, not in a few months!

Meanwhile, it's off to Spotlight for a few supplies :)

MC x

Wednesday, January 23, 2013

Keeping My Hand In

January has been all over the place when it comes to craft. With no major events coming up there hasn't been a pressing need to make anything... other than my itchy fingers and busy brain. I have a million ideas of things to make, some fabulous bag designs in my head, and a bunch of things that need doing around the house.... that is, as soon as Mr Frog goes back to work!

Don't get me wrong, being together these last few months has been great (mostly), especially given the horrendous year we just survived, and the wonderful yet crazy year we have ahead of us.
I just find it impossible to get anything done when he's here!

Anyhoo, here's what I've busied myself with the last few weeks.

A little sparkle to add to a special little girls bedroom door.

I made this door hanger, thingy as a christening gift because A) I'm spiritual, not religious and I think it's healthy to believe in Fairies, B) I usually buy books for kids, but I'm poor, and C) I like making stuff!

Please ignore the slightly dodgy handwriting, not the message!

I've totally gotten into making cards, so this was a great excuse to use more sparkle!

Meanwhile, as I've collected various utensils over the years, yet am running out of space to store them (despite Mr Frogs' attempts to organise the kitchen drawers), I took inspiration from my mums' purpose built utensil holder and "made" this:

A can of Milo gets a second chance at life

I didn't have a big enough piece of paper, so I used some of my favourite fabric.

Next week I have birthday cards and gifts to make... and Mr Frog goes back to work... can't wait to get may craft on!

A bientot!

MC

Monday, January 14, 2013

Flashback


I am still a huge fan of arts and crafts in their simplest forms. Play dough, finger painting, chalk on the foot path. So, I was basically embracing my inner child when I made these table runners for the xmas coffee table. (Little apartment, no room for a proper dining table. This does not prevent me from hosting dinner parties though... trust me!)
I made two, so that I could throw out the dirty one from xmas eve and use a fresh one xmas day. And it was too much fun to just do one.


Use a cardboard cutout of a star (or whatever) as a template for your potato stamper, remembering to make sure there's enough spud to actually hang on to.


Dab potato in paint and stamp away!
Of course I don't have any decent shots of the table fully loaded with food etc, but they worked a treat. I was very happy with myself.
Try it next time you have a dinner party, perhaps using some butchers paper for larger tables.

Have fun!

MC

Deck the Halls, Part Two

Here are some more pics of my xmas decorations... I think they turned out pretty well...


Remember these..?

here they are, all ready for Santa. Yes, that's my heater.

Originally I wanted to make a lovely canvas thing as my xmas wreath... With something poetic yet festive on it. Unfortunately, time got away from me, so I had to run this little number up.
Take one coat hanger and shape it into a circle (roughly... those things are unwieldy!) then twirl a long piece of scrunched up brown paper around and around until the hanger is covered. Add a bow, some cardboard letters (that will blow off in the wind because I still don't own a glue gun), and there you have it.


Voila!

MC

Saturday, December 29, 2012

Oops, Here it is!

I know, I know. I'm late with the easy peasy gift idea.Well, you know what they say. Better late than never! Now that the xmas storm, has died down, and I am finally starting to recover... here it is. The simplest gift anyone can make.
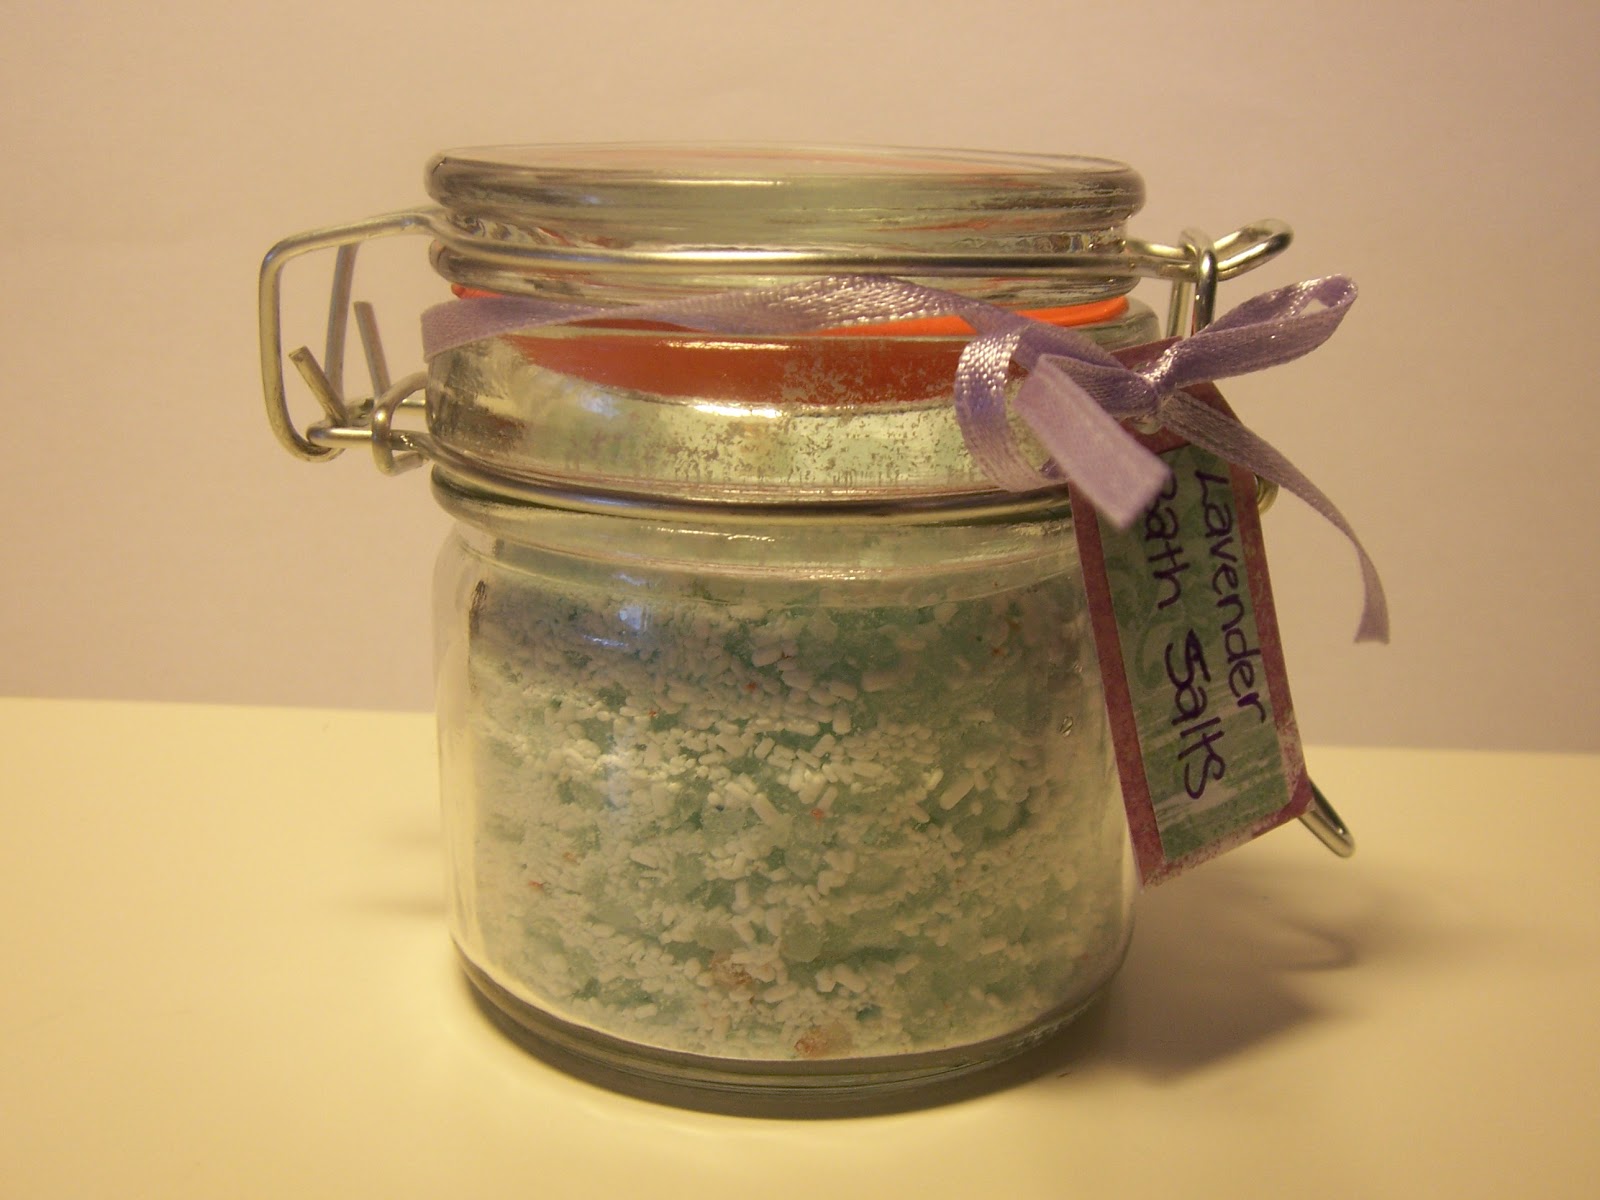
I present to you: Bath Salts.

First grab a non porous bowl, and throw in a cup of Epsom salts, and a cup of rock salt. Then add your choice of essential oil, just a few drops, and a few drops of food colouring. (Don't add too much- nobody wants purple bath water). Pull on a rubber glove and massage for about five minutes, mixing the salts colour and oil.

Note the pale colour... not quite pink. Might be best to use decent gel food colouring, not the supermarket stuff that's been in the cupboard since the dawn of time.

Next, line a baking tray with baking paper, and spread the salts out. Leave for about five hours, or over night.


It's not your eyes, I made two different colours.


All you need to do now is package up your creation and give it a pretty label! The easiest way is to grab a jar and fill it up. You can get cheap jars from most $2 shops, or you can even use a jam jar.


I sent some of my salts to my French family... so to make the parcel lighter, I made these:


Grab yourself some plastic bags from the $2 shop, throw in some salts, make a paper label like this:


Fold the top of the bag down a couple of times, and staple the label to the top, ensuring you've closed the bag in the process. Voila! A little more time consuming sure, but postage is expensive these days!

There you have it, easy peasy to make, and a treat to receive. You could make a whole bath pack, just by popping down to the supermarket and grabbing a loofah, shower cap and a make up bag.

Hope you all had a Joyeux Noel, see you in the New Year.

MC


Tuesday, December 11, 2012

Deck the Halls... or heater

Please forgive my absence... I've been a busy girl, what with all the decorating, making of stuff and watching t.v. I return with a fun little project that's so simple the kids can do it for you!
This xmas, we're (o.k, maybe it's just me) going all out simply because this year my family will be here, and we'll actually have time to enjoy ourselves!
I thought it mght be fun to hang some stockings on the heater (in lieu of an actual mantel) and fill them with some silly bits and bobs. I stole this idea from last years xmas edition of Better Homes and Gardens magazine. Theirs is much nicer, but mine is cheaper. :)


First, cut yourself some squares of red (or whatever) cardboard. I made mine 21cm square, half of the original pattern... the bigger they are, the more you need to put in! You'll also need to cut out some more squares in a contrasting colour. My theme this year is Red and Brown paper. I just so happened to have some paper bag scraps that I used instead (which is why they're smaller than my red squares). The original pattern uses fabric, on the outside. 


Brown paper glued to the "top" corner


Next, you'll need to decorate the outside. Intent on using my scraps, I cut stars out of brown paper and glued them on.


Now we're ready to rock'n'roll, especially roll. With one point of your square being the top, roll the cardboard into a cone. This is where I struggled because stupid me used thick cardboard. get the thin stuff!


Add double sided tape to keep the cone in place. If you used thin cardboard, that should be all you need.
Next, we need name tags so there aren't any fights. I used my excess cardboard and the trusty brown paper bag scraps.


Punch a hole in the tag, a hole in the pointy bit of your cone, and another where the cardboard wraps around itself, and attach the tag with ribbon.


Mine just would NOT stay, so I've used a paper clip and hung my tag on it.

All that's left to do is hang them, then wait for ages until you can fill them!


And voila, "stockings" hung and ready for Santa.

Coming soon, an easy peasy gift that requires no skill.

A bientot

MC